
Communication Tower Installation Quality Standards Guide

Dealing with Overweight 5G steel tower
February 20, 2026
Communication Towers Q355 Steel VS Q390/Q420 Steel
March 4, 2026
The Dirt Under My Nails: A Field Guide to Communication Tower Installation Quality
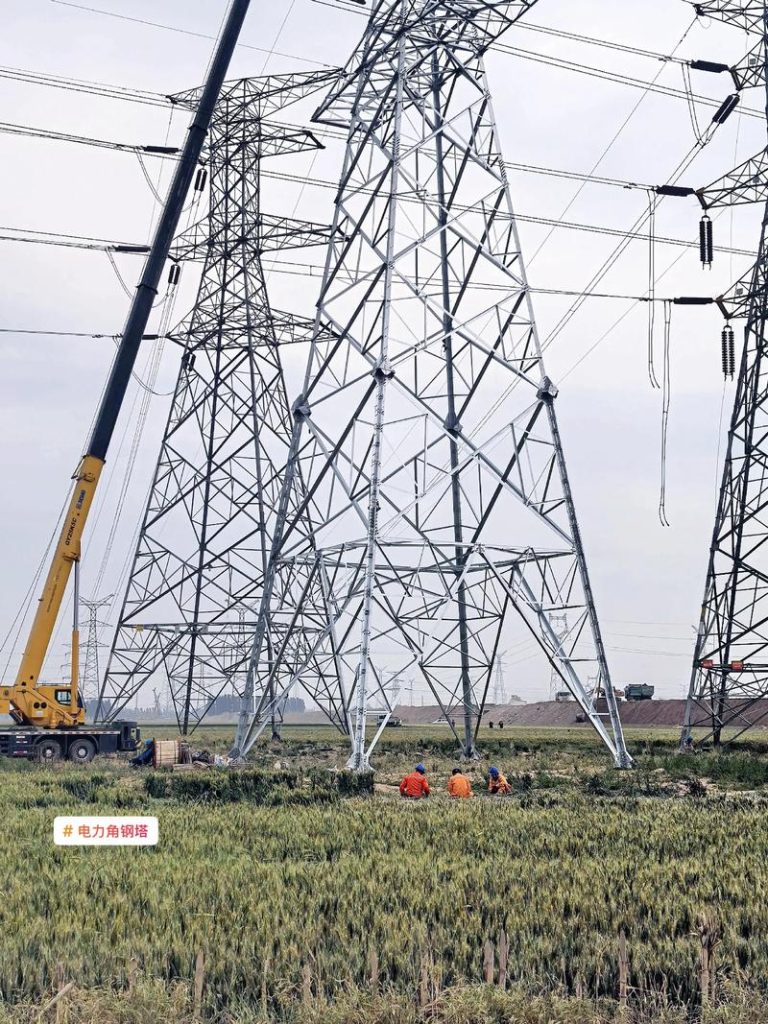
You know what looks great on paper? Everything. The CAD drawings are perfect. The stress calculations come out clean. The bill of materials is all checked off. Then you show up on site, and the access road is mud, the concrete truck is stuck, and the foundation rebar cage looks like someone built it from memory after a long lunch. That’s where real quality starts. Not in the office. Right here, with your boots sinking into the dirt.
I’ve been doing this for thirty-two years. Started as a rigger’s helper, worked my way up to superintendent, now I’m the guy they call when something goes wrong or when something absolutely cannot go wrong. I’ve put towers on mountaintops in Montana, in swamps in Florida, on reclaimed landfill in New Jersey. I’ve seen good installations that outlasted their designers, and I’ve seen bad ones that failed before the paint dried.
This guide isn’t from a textbook. It’s from calluses, from watching things fall down, from figuring out why, and from fixing it so it stays up.
Before You Stick Anything in the Ground: The Foundation
Let’s start at the bottom, because that’s where gravity wins or loses. I don’t care how perfect your steel is. If the foundation moves, the tower is scrap. Pure and simple.
The Concrete Test Nobody Talks About
You’ll get the paperwork. Mill certificates for the rebar, mix design reports from the ready-mix plant, cylinder break tests from the lab. All fine. But here’s what I do: I watch them pour. Not from the truck cab. I’m standing at the edge of the hole, looking at the concrete coming out of the chute.
Had a job in South Carolina once. Big 180-foot self-supporter going in on a hilltop. Beautiful site. Concrete shows up, starts flowing. I notice it’s running slow. Too stiff. I grab a handful—yes, a handful—and squeeze. It doesn’t slump right. Holds together but feels… grainy. I stop the pour. Call the batch plant. Turns out their aggregate stockpile got contaminated with fine dirt from the last rain. They didn’t check. That foundation would’ve looked fine for a year, maybe two. Then the fine particles would’ve weakened the bond, micro-cracking starts, water gets in, freeze-thaw does its work, and five years later you’ve got a tower leaning like the Tower of Pisa without the tourist appeal. We made them send new concrete. The project manager cursed me for the three-hour delay. I told him he could curse me now or curse me when we were jacking the tower straight later. He shut up.

The Anchor Bolt Cage: Where Precision Goes to Die
The anchor bolt cage is your connection between the earth and the sky. It has to be absolutely perfect. And it almost never is, unless you fight for it.
Here’s the problem: you set the cage in the hole, tie it to the rebar, and then the concrete truck shows up and dumps six yards of mud directly on top of it. The vibration from the pour, the weight of the concrete, the workers walking around—everything tries to shove that cage out of alignment.
I had a crew in Texas once, young guys, eager. They set a beautiful anchor cage for a 120-foot monopole. Leveled it, braced it, checked it twice. Then they poured. After the pour, I climbed down with my tape. The whole cage had shifted an inch and a half off center. The foreman said, “Ah, it’s close enough, we’ll slot the base plate.” I fired him. Not joking. I sent him back to the office. An inch and a half eccentricity on a tall monopole? That’s not a construction issue anymore. That’s a structural issue. The bending moment from that eccentricity alone adds stress the tower wasn’t designed for. You slot the plate, you hide the problem, and ten years from now some engineer is scratching his head wondering why the tower failed below the design wind speed.
We broke out the concrete. Redid the cage. Used a steel template plate—what we call a “top template”—bolted to the top of the cage with the exact hole pattern. That template stays on during the pour. You check it with a transit before, during, and after. No movement. That’s the standard. Not “close enough.” Dead nuts.
Here’s a formula I use for anchor rod projection. The drawings always say something like “project 4 inches above finished concrete.” But finished concrete isn’t flat. It has a crown for drainage. So I calculate adjusted projection:
Where
is usually 1/8 inch per foot of pier diameter. If your pier is six feet across, that’s nearly an inch of crown. Set your anchors to the spec without accounting for that, and after the concrete crowns, your leveling nuts have no thread left underneath. The tower ends up sitting on the concrete, not the nuts. That’s a leveling nightmare and a corrosion trap. Water sits right there, against the steel. I’ve seen it.
The Steel Shows Up: Inspection Before Erection
Tower steel comes from the galvanizer looking beautiful. Shiny, like jewelry. Don’t be fooled.
Galvanizing: Pretty Isn’t the Same as Good
First thing I do is walk every piece with a magnet. Galvanizing hides a multitude of sins. I’m looking for bare spots, but I’m also looking for something else: gray patches. If galvanizing cools too slowly, or if the zinc bath wasn’t right, you get a thick, dull gray layer. It’s brittle. It will flake off under load or thermal stress. I tap it with a hammer. If it flakes, that piece is rejected.
Had a shipment from a new supplier in Ohio a few years back. Beautiful stuff. Shiny as a new quarter. We started assembling and I noticed a diagonal brace for a 100-footer had a hairline crack right at a gusset weld. Under the galvanizing. The galvanizing had flowed into the crack and sealed it over. You couldn’t see it until we bolted it up and the gap opened slightly. That crack would’ve grown. First big wind storm, that brace fails, load redistributes to others, and you get a cascading failure. We X-rayed ten more pieces from that batch. Found three more with similar issues. Sent the whole truck back. The supplier screamed about delays. I told them to scream at their welders, not me.
Bolt Matching: The Color Code
Bolts come in boxes. High-strength stuff, A325 or A490. They all look gray. But they’re not all the same. I make my crew lay them out by heat number. You don’t mix bolts from different batches in the same connection. The torque-tension relationship varies slightly between heats. Mix them up, and you’ll have some bolts taking more load than others. The connection fails earlier than calculated.
We mark them. Paint dots on the heads. Red for one batch, blue for another. Sounds anal. I’ve had young engineers roll their eyes. Then I show them the research: connections with mixed batches show 15-20% more variation in final tension. That’s a risk I don’t take when the connection is holding up 200 feet of steel and a million dollars of equipment.
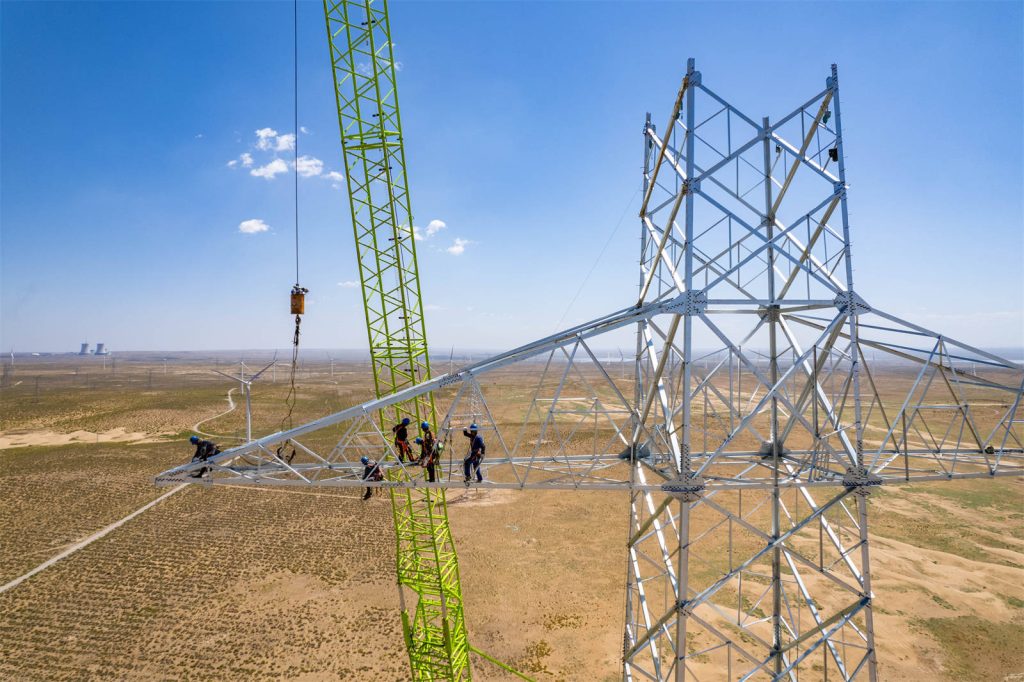
Erection: Where Theory Meets the Wind
Rigging a tower is controlled chaos. But it has to be controlled.
Plumbness: The Number You Can’t Ignore
Every spec says the tower must be plumb within 1:500. For a 200-foot tower, that’s about 5 inches off vertical at the top. Sounds generous, right? It’s not. That 5 inches is total deflection from base to top, including any lean from the foundation and any sweep in the steel.
I’ve seen towers that went up quick and looked straight. Then we climbed them with a theodolite on a calm day. They were leaning 8 inches. The crew said, “It’s close enough.” It’s not. That lean creates a permanent eccentric load. The tower is always bending slightly, even with no wind. Fatigue life drops. The tension in the bolts on the low side is higher than calculated. Something will give eventually.
We plumb as we go. Every 20 feet, we check. We use temporary guys to pull it straight. You don’t wait until the top is on. By then, the weight has set, and you’re fighting years of creep in the connections. Plumb it as you build it, section by section.
Here’s a trick: on a three-legged tower, you can’t just measure from two sides. You have to measure from three points, 120 degrees apart, and average them. The tower can look plumb from the north and east but be twisted. Twist is just as bad as lean. It puts torsional stress on the connections. Measure all three faces.
Bolt Tension: The Sound of Safety
You know how you can tell if a bolt is tight? Not by the torque wrench alone. By the sound. A properly tensioned A325 bolt, when struck with a calibrated wrench, rings. A loose one thuds. I’m not joking. I’ve walked across a tower platform and heard the difference. The good ones sing. The bad ones are dead.
But sound isn’t enough. We use the turn-of-nut method for critical connections. Snug tight, then a specific rotation—usually 1/3 turn for bolts 8 diameters or less in length. That induces the right tension regardless of friction variations. Torque wrenches are good, but they measure friction, not tension. Turn-of-nut measures actual stretch.
On a job in North Dakota, bitter cold, minus 20, the torque wrench readings were all over the place. The cold changed the friction. But the turn-of-nut method worked fine. The bolts stretched the same amount. That tower is still standing through those brutal winters.
The Cable Run: Small Details, Big Failures
Antennas are the glamour part. The cables are the veins. And they get abused.
The Minimum Bend Radius Rule
Every cable has a minimum bend radius. Usually 10 to 12 times the cable diameter. Exceed it, and you micro-fracture the copper braid or the dielectric. The cable might pass a continuity test at installation. A year later, with thermal cycling and vibration, those micro-fractures grow into open circuits. You climb up to fix a “bad radio” and find the cable is physically broken inside the jacket.
I make my crews use bend radius guides at every hanger. No sharp turns. No cinching the cable tight against a sharp edge. We use cushioned clamps. And we leave a service loop at the top and bottom. Why? Because cables expand and contract with temperature. A 100-foot cable run can change length by several inches between summer and winter. If it’s pulled tight, something has to give. Usually the connector.
Had a site in Arizona. Desert heat, 110 in the day, 60 at night. Big temperature swings. The installer pulled the cables drum tight. Looked neat. Six months later, three radios were down. The connectors had pulled loose from the antennas. The cable shrank in the cold and pulled the center pin out of the jack. We replaced the cables and left a 12-inch loop at the top. Never had another problem.
The Grounding: Not Just a Wire
Lightning doesn’t care about your schedule. It finds the path of least resistance. You want that path to be your ground system, not your electronics.
Every tower leg gets a ground rod. They’re bonded together with exothermically welded connections, not mechanical lugs. Mechanical lugs corrode. Exothermic welds become part of the metal. They don’t loosen.
I’ve seen grounds that tested fine at installation—2 ohms, perfect. A year later, 50 ohms. What happened? The connections corroded. Or the ground rod wasn’t driven deep enough and the soil dried out around it. Ground resistance varies with moisture. You have to drive deep enough to reach permanent moisture. In some places, that’s 10 feet. In others, 30.
We use the fall-of-potential method to test:
Three stakes, 62% spacing, measure voltage drop. That’s the standard. But I also look at the soil. If it’s sandy, we use longer rods or chemical grounds. If it’s rocky, we use counterpoise radials. One size does not fit all.
The Final Walk: Trust But Verify
Before I sign off on a tower, I climb it. Every time. I don’t care if it’s 100 feet or 500 feet. I climb.
I’m looking for things that don’t show up on paper. A bolt that’s tight but doesn’t have enough threads showing beyond the nut. That’s a connection that might pull through under load. A ground wire that’s rubbing against a sharp edge. That’s a future failure. A drip loop that’s too small, letting water run down the cable into the connector. That’s corrosion waiting to happen.
I had a tower in Virginia, beautiful work, everything perfect on paper. I climbed and found a diagonal brace that was bowed slightly. Maybe 1/4 inch out of straight. The erectors said it was fine, just a bent piece from shipping. I made them replace it. That bow meant the brace was already stressed, just sitting there. Under load, it would buckle early. The tower might not fail, but the load distribution would be wrong. Other members would pick up the slack and be overstressed. Replace it now or replace more later. We replaced it.
What Keeps Me Up at Night
New technology is great. Better steel, better analysis, better monitoring. But it also creates new problems.
The big one now is 5G equipment. Those AAUs are heavy. They’re often added to old towers designed for much lighter loads. We’re seeing towers that were fine for ten years suddenly needing reinforcement. And the reinforcement has to be done without taking the tower down. That means hot work at height, welding on live steel. Scary stuff. We use temporary supports, we control heat input carefully, we inspect every inch afterward. But it’s risky.
Another trend is remote monitoring. Sensors on towers, feeding data to the cloud. Great for catching problems early. But sensors fail. They get hit by lightning. They drift out of calibration. You still need a human to climb up and look. The data tells you something might be wrong. Only your eyes tell you what.
The Bottom Line
I’ve been doing this long enough to know that quality isn’t a checklist. It’s a mindset. It’s the willingness to stop the job when something’s wrong, even if it costs money. It’s the discipline to measure twice and cut once, even when you’re tired and cold and just want to go home. It’s the humility to listen to the old-timer who says, “That doesn’t look right,” even when the drawing says it is.
Every tower I’ve signed off on, I think about when I’m old and retired. I wonder if they’re still standing. I hope they are. I know the ones I built right will be. The ones I cut corners on? There aren’t any. Because I learned a long time ago that cutting corners on a tower isn’t cutting a corner. It’s cutting your own throat, or worse, someone else’s.
Stay safe up there. Check your bolts. And never trust the concrete until you’ve touched it.
gsdfgsdfgsdfgsdfg
sdfgsdfgsdfgsdfg
Anchor Bolt Cage Misalignment
This is what happens when you don’t use a template. The cage shifts during concrete placement.
FOUNDATION PLAN VIEW (LOOKING DOWN)
12-Bolt Pattern - 48" Bolt Circle

DESIGN POSITION              WHAT WE FOUND IN SOUTH CAROLINA
(Within 1/8" tolerance)       (1.5" shift to southeast)

        N                              N
        |                              |
        |                              |
   W----+----E                    W----+----E
        |                              |   X
        |                              |  X
        S                              S X
                                      XXX

Bolt Circle:                    Bolt Circle:
○ ○ ○ ○ ○ ○ ○ ○ ○ ○ ○ ○         ○ ○ ○ ○ ○ ○ ○ ○ ○ X X X X
                                                      ^
                                                3 bolts 1.5" off

ANCHOR ROD PROJECTION ERROR

Spec: Project 4" above concrete
Actual concrete crown: 1/8" per foot × 6' diameter = 3/4" crown

      BEFORE POUR                 AFTER POUR (CROWNED)
      [Plate]                     [Plate]
         |                            |
         |                            | <-- Only 3-1/4" showing
         |                            |     Not enough for nuts
    [-----]-----Concrete          [-----]=====Concrete
         |                            |    (Crowned)
         |                            |
      [Anchor Rod]                 [Anchor Rod]

Result: Leveling nuts have no thread. Tower sits on concrete.
The math on anchor projection:
For 4″ spec with 3/4″ crown:
Set them to 4″ and you’re screwed. I’ve seen it.
Tower Plumbness: The Three-Face Check
Most crews check two sides. On a triangular tower, that’s not enough.
TRIANGULAR TOWER SECTION
Looking down from above

        Face A
         /\
        /  \
       /    \
      /      \
     /        \
    /          \
   /            \
  /              \
 /                \
/                  \
\                  /
 \                /
  \              /
   \            /
    \          /
     \        /
      \      /
       \    /
        \  /
         \/
      Face C    Face B

THEODOLITE POSITIONS
Set up at 120° intervals:

POSITION 1: Sight along Face A
POSITION 2: Rotate 120°, sight along Face B
POSITION 3: Rotate 120°, sight along Face C

READINGS AT 200-FOOT HEIGHT (inches)

TOWER "A" - Looks straight from two sides
Face A: +1.0" (leans north)
Face B: +0.5" (leans northeast)
Face C: -1.5" (leans southwest)  ← PROBLEM!

Average = (1.0 + 0.5 - 1.5)/3 = 0.0
Maximum deviation = 1.5" → Tower has twist

TOWER "B" - Actually straight
Face A: +0.2"
Face B: +0.1"
Face C: -0.3"
Average = 0.0, Maximum = 0.3" ✓

TORQUE ON CONNECTIONS FROM TWIST

Twist angle θ = (1.5" / 200') × (1'/12") × (180/π) × 60 = ~0.04 degrees
Sounds small? At each connection, that creates shear:
V = T × θ / bolt circle radius

For 100 ft-kips torque, 24" bolt circle:
V ≈ 100,000 × 0.0007 / 2 = 35 lbs per bolt
Added to design load. Over 20 years? Fatigue.
The twist doesn’t show on paper. You have to measure all three faces. I learned this the hard way in Virginia.
Turn-of-Nut Method: What Happens Inside the Bolt
This is the progression of tension as you turn the nut.
BOLT TENSION vs. NUT ROTATION
A325 Bolt - 3/4" diameter x 4" long

Tension (kips)
  30 |
     |                                    X
  25 |                                 X
     |                              X
  20 |                           X
     |                        X
  15 |                     X
     |                  X
  10 |               X
     |            X
   5 |         X
     |      X
   1 |   X  <-- Snug tight
     |X
   0 +---+---+---+---+---+---+--
     0  1/8 1/4 3/8 1/2 5/8 3/4
            Turns from snug

WHAT IT FEELS LIKE:

Snug tight: "Contact... tight by hand..."
1/8 turn:   "Wrench is taking effort..."
1/4 turn:   "Getting stiff now..."
1/3 turn:   "GRUNT. That's it." (28,000 lbs)
1/2 turn:   "Why is it getting easier? Oh sh--"
            (Bolt yielded - permanently stretched)

TENSION CALCULATION:
T = (θ/360) × P × K

Where:
θ = rotation from snug (degrees)
P = thread pitch (1/10" for 3/4-10 bolt)
K = stiffness factor (~1,000,000 lbs/in for this length)

At 1/3 turn (120°):
T = (120/360) × 0.1 × 1,000,000 = 33,300 lbs
Minus friction losses → ~28,000 lbs actual
Torque wrench reads 250 ft-lbs. Could be 20,000 lbs or 35,000 depending on lubrication. Turn-of-nut doesn’t lie.
Cable Thermal Movement: Why Service Loops Matter
Temperature change makes cables expand and contract. This is what happens.
VERTICAL CABLE RUN - 100 FEET
Winter vs Summer position

WINTER (-20°F)                 SUMMER (+100°F)

Top Connector                  Top Connector
     |                              |
     |                              |
     |                              |
     |                              |
     |                              |
     |                              |
     |                              |
     |                              |
     |                              |
     |                          ___/    Service
     |                         /        loop
     |                        /         opens
     |                       /
     |                      /
     |                     /
     |                    /
     |                   /
     |                  /
     |                 /
     |                /
     |               /
     |              /
     |             /
     |            /
     |           /
     |          /
     |         /
     |        /
     |       /
     |      /
     |     /
     |    /
     |   /
     |  /
     | /
     |/
Bottom Connector               Bottom Connector

LENGTH CHANGE CALCULATION:
ΔL = L × α × ΔT

L = 100 ft = 1200 inches
α (copper) = 9.4 × 10⁻⁶ /°F
ΔT = 120°F (-20°F to +100°F)

ΔL = 1200 × 0.0000094 × 120 = 1.35 inches

WITHOUT LOOP:
Cable pulls 1.35" on connector
Copper work-hardens, fractures
Connector pin pulls out of jack

WITH LOOP:
Loop opens 1.35"
Connector sees zero stress
Arizona site, 2019. No loops. Three radios dead at 3 AM. Coldest night in a decade. Cables shrank, popped connectors. Client called me at 4 AM. Not fun.
