Technical Analysis of 110kV to 750kV Transmission Line Towers
December 7, 2025
High-Strength Steel Application in Transmission Tower Manufacturing
December 14, 2025A Deep Technical Analysis of Transmission Line Tower Manufacturing Standards
The Unseen Architecture of Power: A Deep Technical Analysis of Transmission Line Tower Manufacturing Standards
The modern world, with its insatiable appetite for energy and connectivity, is supported not just by digital networks and financial systems, but by the tangible, physical backbone of the electrical grid. At the core of this monumental infrastructure stands the transmission line tower, a silent sentinel of steel and zinc that must defy gravity, weather, and time to uphold the flow of power across vast, unforgiving landscapes. The creation of these towers is not merely a process of cutting and bolting metal; it is a highly specialized discipline governed by an intricate, interwoven matrix of Technical Manufacturing Specifications and Standards. These standards represent the distilled wisdom of a century of engineering experience, failure analysis, and material science, codifying the absolute minimum requirements necessary to ensure the reliability, longevity, and—most critically—the safety of the entire power transmission system. To understand the manufacturing process is to appreciate the rigorous, almost philosophical commitment to precision required at every stage, from the chemical makeup of the raw steel to the final, field-erected dimensional alignment.
The Foundational Standards: Material Science and Metallurgical Purity
The journey of the transmission tower begins long before the first angle or plate is cut; it starts in the steel mill, where the very chemistry of the structural material is scrutinized under the exacting lens of international and national standards. The choice of steel grade is a complex engineering decision, balancing the economic constraints of mass production with the non-negotiable demand for high yield strength ($\text{R}_\text{e}$) and excellent fracture toughness, especially in cold or seismically active environments. Standard specifications like the ASTM A36 (for basic, lower-strength components), ASTM A572 Grade 50/65 (or European equivalents like EN 10025 S355 or Chinese standards like GB/T 1591 Q345 for high-stress members), dictate the acceptable chemical composition and mechanical properties. The acceptable limits for elements such as Carbon (C), Manganese (Mn), Phosphorus (P), and Sulfur (S) are paramount. Carbon content, for instance, must be carefully controlled; while higher carbon increases strength, it severely degrades weldability (though towers are predominantly bolted) and, more importantly in this context, makes the steel susceptible to brittle fracture and hydrogen embrittlement. Manganese acts as a vital deoxidizer and sulfur neutralizer, but its proportion must be meticulously maintained to enhance tensile strength without introducing undue hardness that complicates punching and drilling operations. Conversely, the presence of impurities like Phosphorus and Sulfur must be minimized to infinitesimal levels, often measured in hundredths of a percent, because these elements are notorious for concentrating at grain boundaries, forming low-melting point eutectics that lead to “hot shortness” during rolling or, more critically, becoming the nucleation points for micro-cracks and lamellar tearing under the cyclical loading of wind-induced vibration. The manufacturing standard, therefore, begins with the Material Traceability Standard, demanding complete chain-of-custody documentation, or “Mill Certificates,” that prove the steel delivered to the fabrication shop meets the specified metallurgical purity and mechanical test results—including tensile strength, yield strength, and percentage elongation—a critical parameter for ensuring the tower has the necessary ductility to deform rather than shatter under extreme, unexpected loads like a broken conductor event. This foundational adherence to material standards is the bedrock upon which all subsequent manufacturing quality is built, creating a silent guarantee that the structure possesses the inherent strength to fulfill its decades-long service mandate.
Fabrication and Dimensional Tolerance: The Geometry of Trust
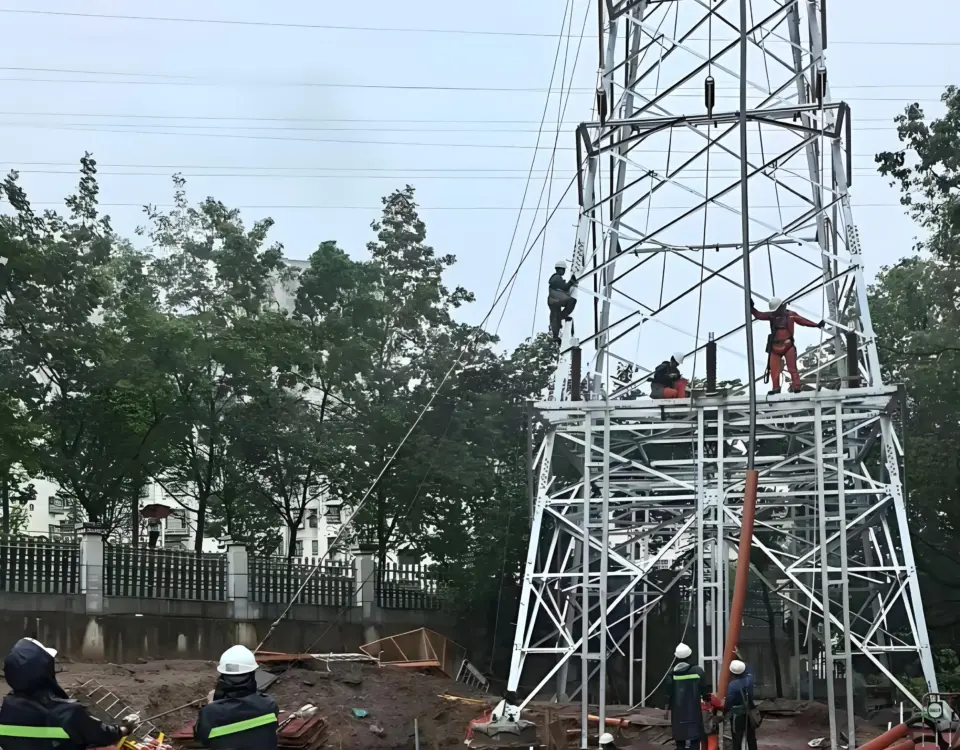
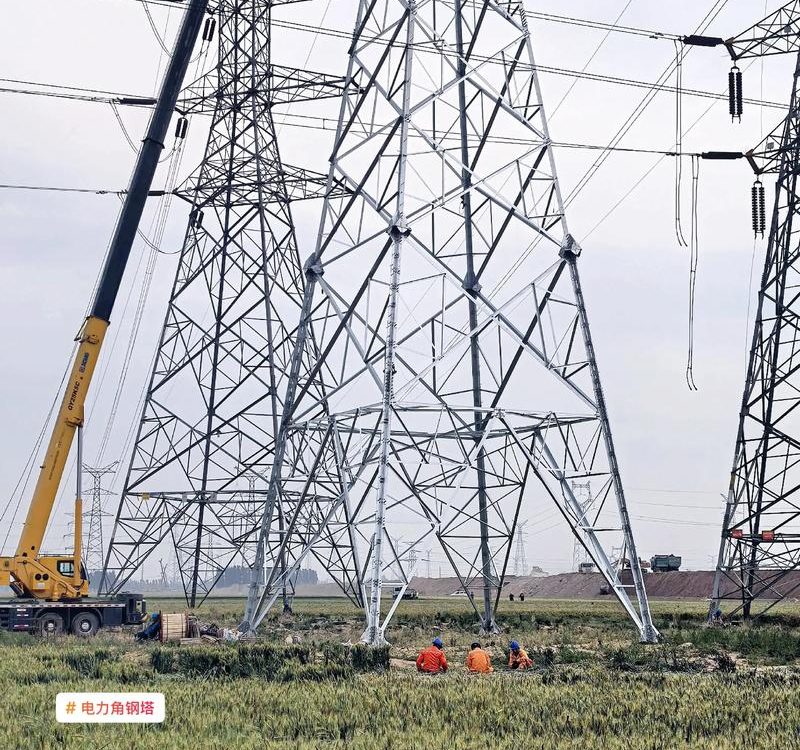
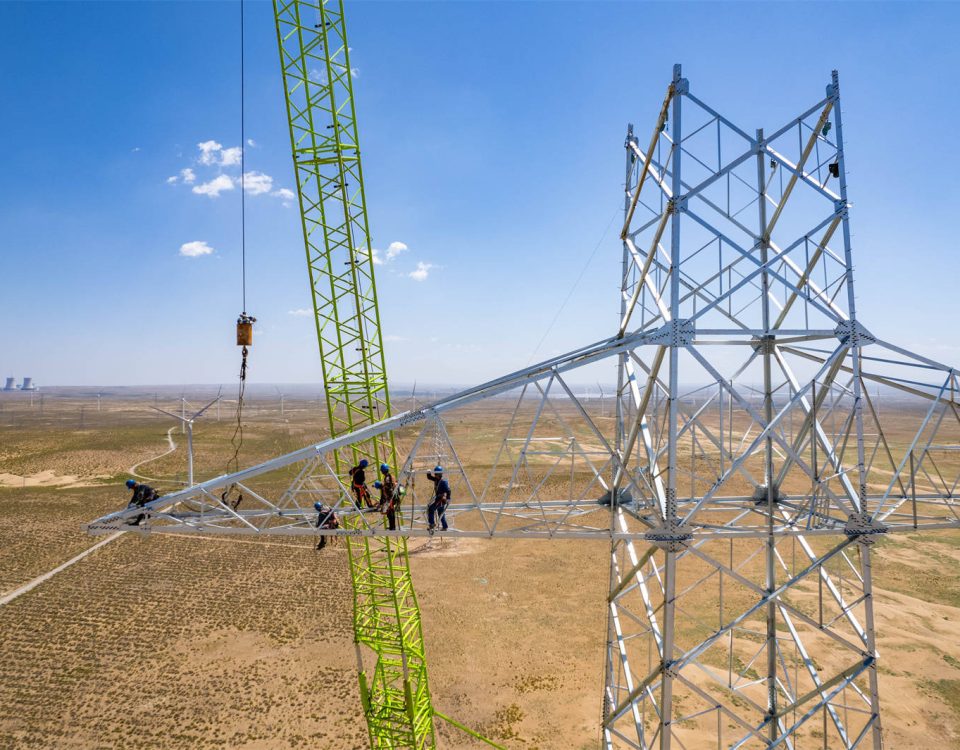
Once the certified steel is received, the manufacturing process transitions from metallurgy to precision geometry, governed by an entirely different set of technical specifications focused on Dimensional Accuracy and Fabrication Tolerance. A transmission tower is a massive, three-dimensional jigsaw puzzle, often comprising tens of thousands of individual members—angles, channels, and plates—each with a unique length, hole pattern, and section profile. The single most critical standard in this phase is the Tolerance Specification for Hole Alignment and Member Length. Towers are assembled on-site using friction-grip bolts, and for a successful erection, the bolt holes in any two mating members must align perfectly. The tolerance allowed for the cumulative deviation across a tower face, particularly for the main legs which bear the compressive load and span the height of the structure, is often specified in standards like IEC 60826 (Design Criteria) and derivative manufacturing specs, sometimes permitting deviations of only $\pm 1.0$ mm over several meters of length. This degree of precision necessitates advanced manufacturing techniques, such as computer numerically controlled (CNC) punching and drilling machines, which receive their instructions directly from the digital model, eliminating human error inherent in manual templating. The technical standard mandates that the fabrication shop must not only use this high-precision machinery but must also maintain a rigorous Calibration and Maintenance Schedule for it, ensuring the positioning repeatability of the machine heads is verified weekly or even daily. Furthermore, the standard often requires Trial Assembly or Fit-Up Checks, particularly for the most complex or primary members (like the base sections and the bracing connecting the main legs), wherein a small percentage of the fabricated steel is physically bolted together on the shop floor to confirm alignment before the entire batch is shipped. This step, while resource-intensive, acts as the ultimate quality gate, preventing catastrophic delays and rework in remote field locations where non-conforming steel could halt a multi-million dollar project. The specifications also cover secondary, yet vital, processes such as the quality of Shearing and Cutting. Standards demand that the edges be clean, perpendicular to the member surface, and free from excessive burrs, nicks, or thermal distortion caused by poor cutting practices, as these imperfections can act as Stress Concentration Factors that could initiate fatigue cracking under cyclical wind loads, especially in high-strength steels. The uniformity of the finished component ensures not just ease of erection, but the structural integrity of the final, load-bearing lattice structure.
| Structural Component | Relevant Standards (Example) | Critical Manufacturing Parameter | Tolerance Example (Illustrative) |
| Raw Steel Materials | ASTM A572 Gr. 50, EN S355, GB Q345 | Chemical Composition (P/S Content) & Yield Strength ($R_e$) | P/S $\le 0.035\%$; $R_e \ge 345 \text{ MPa}$ |
| Member Length/Geometry | IEC 60826, Specific Client Specs | Cumulative Length and Straightness Deviation | $\pm 1.5 \text{ mm}$ over $6 \text{ m}$ member length |
| Bolt Hole Punching/Drilling | ISO 2768-1 (Fine), AISC/ASCE Guidelines | Positional Accuracy between adjacent holes | $\pm 0.5 \text{ mm}$ maximum deviation |
| Hot-Dip Galvanizing | ISO 1461, ASTM A123 | Average Coating Thickness and Uniformity | Minimum $85 \text{ \mu m}$ for $\ge 6 \text{ mm}$ thick steel |
The Imperative of Corrosion Protection: Hot-Dip Galvanizing Standards
The fabrication process culminates not in a ready-to-erect structure, but in a temporary, highly reactive state: bare steel. This steel, the physical embodiment of all the preceding precision, must be shielded from the relentless, thermodynamic drive toward equilibrium—rust—which will inevitably destroy its load-bearing capacity over time. The primary technical condition for achieving this longevity is adherence to the Hot-Dip Galvanizing (HDG) Standard, most commonly governed by internationally accepted specifications such as ISO 1461 (for fabricated iron and steel articles) or ASTM A123/A123M (for zinc coatings on iron and steel products). This is not a superficial application; it is a meticulously controlled metallurgical process where the steel is chemically bonded with molten zinc ($\text{Zn}$). The standard dictates every stage of this complex operation, starting with the crucial Surface Preparation, which involves alkali degreasing, water rinsing, and Acid Pickling (typically with hydrochloric or sulfuric acid) to completely remove mill scale and rust—impurities that would prevent the formation of the zinc-iron alloy layers. The pickling time and acid concentration must be monitored continuously to prevent over-pickling, which can embrittle high-strength steels.
The next critical specification relates to the Fluxing Process, where the material is dipped into an aqueous solution (often zinc ammonium chloride) to clean residual oxides and prepare the surface for the molten zinc. Finally, the steel is immersed in the Molten Zinc Bath, maintained at a precise temperature, typically between $440^\circ \text{C}$ and $460^\circ \text{C}$. The duration of immersion and the temperature control are dictated by the standard and are crucial factors determining the final Coating Thickness. During immersion, a complex series of intermetallic layers form: the $\Gamma$ (gamma), $\delta_1$ (delta one), $\zeta$ (zeta), and finally the outer, relatively pure $\eta$ (eta) layer. These layers, in order from the steel substrate outwards, are progressively richer in zinc and harder, creating a robust, abrasion-resistant barrier. The primary manufacturing standard here is the Minimum Average Coating Thickness Requirement, which is not uniform across all members. The required thickness is directly proportional to the thickness of the underlying steel member, recognizing that thicker steel generally requires, and can sustain, a thicker coating for equivalent lifespan. For example, standards may require a minimum average coating thickness of $85 \text{ \mu m}$ for steel sections $6 \text{ mm}$ or thicker, while thinner sections might require $65 \text{ \mu m}$. Failure to meet this standard, often measured using a magnetic thickness gauge (a non-destructive test), is grounds for rejection. Furthermore, the standard is stringent on Coating Uniformity and Adherence. It prohibits defects such as bare spots (uncoated areas that invite immediate corrosion), excessive dross inclusions (zinc-iron particles that result in rough, non-adherent patches), and white rust (premature oxidation of the zinc coating itself, usually due to poor storage conditions). The standards governing HDG are effectively the tower’s life insurance policy, and adherence to them guarantees the structural integrity for the intended service life of fifty years or more, regardless of the environmental severity. The entire process requires a delicate balance of chemical control, thermal management, and rapid, careful handling to achieve a uniform, metallurgically-sound, and robust protective shield.
Quality Control and Assurance: The Validation of Precision
The execution of precision fabrication and high-quality galvanizing is constantly scrutinized by a complex system of Quality Control (QC) and Quality Assurance (QA) standards, ensuring that every component not only looks correct but is fundamentally compliant. This phase is governed by overarching standards like ISO 9001 (for the Quality Management System itself) and specific inspection and testing specifications. A critical manufacturing standard often cited by power utilities worldwide is IEC 60652: Loading tests on overhead line structures, though its primary application is design validation, its principles deeply inform the manufacturing QC process.
Before shipping, two primary QC steps are universally required: Dimensional Inspection and Non-Destructive Testing (NDT). Dimensional inspection involves a random sampling plan where QC engineers use sophisticated measuring tools, including laser scanners or coordinate-measuring machines (CMMs) for complex base plates, to verify that the final, galvanized members adhere to the strict tolerances established in the fabrication phase. This check includes verifying hole pitch, member length, straightness, and the true flatness of connection plates, with the standard dictating the acceptable limits of non-conformance. Any deviation beyond the specified $\pm$ tolerance results in the component being quarantined and often scrapped, as re-working galvanized steel is prohibitively difficult and compromises the corrosion protection.
NDT, while less common on purely bolted lattice towers, becomes critical when specialized components require shop welding, such as base grillage, anchor bolts, or cross-arm brackets. Standards require visual inspection of all welds, supplemented by techniques like Magnetic Particle Testing (MPT) or Ultrasonic Testing (UT) to detect subsurface defects like porosity, incomplete fusion, or cracking that are invisible to the naked eye. The technical condition requires that the QC personnel performing these tests must be certified to internationally recognized levels (e.g., ASNT Level II or III), ensuring that the integrity of the critical welds is verified by competent personnel using calibrated equipment.
The apex of QC standards, however, is the Full-Scale Prototype Test, which, while primarily a design validation step under IEC 60652, serves as the final, most definitive manufacturing standard for new tower types. The specification requires that a production-ready sample tower—manufactured using the exact steel grades, fabrication methods, galvanizing processes, and bolt assemblies—be erected at a certified testing station. This tower is then subjected to a series of increasing, measured loads simulating the most severe design scenarios: maximum wind-induced compression, critical broken-wire line tensions, and torsional loads. The standard dictates the load application methodology, the rate of increase, and the locations where deflection, strain, and permanent set must be measured. The ultimate test of the manufacturing quality is whether the tower can sustain $100\%$ of the required design load without catastrophic structural failure or unacceptable permanent deformation. The manufacturing facility’s adherence to the quality standards is proven by the successful performance of the physical product under the most rigorous physical trial. The failure of a prototype test is not just a design failure; it is an immediate indictment of the manufacturing process, forcing a complete review of material quality, fabrication tolerances, and bolt tightening standards, ultimately underscoring the interconnectedness of design criteria and production execution.
Bolting Specifications and Assembly Integrity: The Joint as the Weak Link
The integrity of a transmission tower relies entirely on the successful transfer of loads through its joints, making the Bolting Assembly Specifications a critical component of the overall manufacturing standard. Unlike welded structures, lattice towers are inherently designed to be assembled on-site using high-strength structural bolts, nuts, and washers. The primary technical condition here revolves around the quality of the bolting components themselves, which must meet standards such as ASTM A325 or A490 (High Strength Bolts) or the equivalent ISO 898-1/ISO 898-2 (for property classes like 8.8 or 10.9). These standards dictate not only the tensile and yield strength of the bolt material but also the minimum length of thread engagement and the necessary corrosion protection, typically achieved through either hot-dip galvanizing or specialized mechanical coatings.
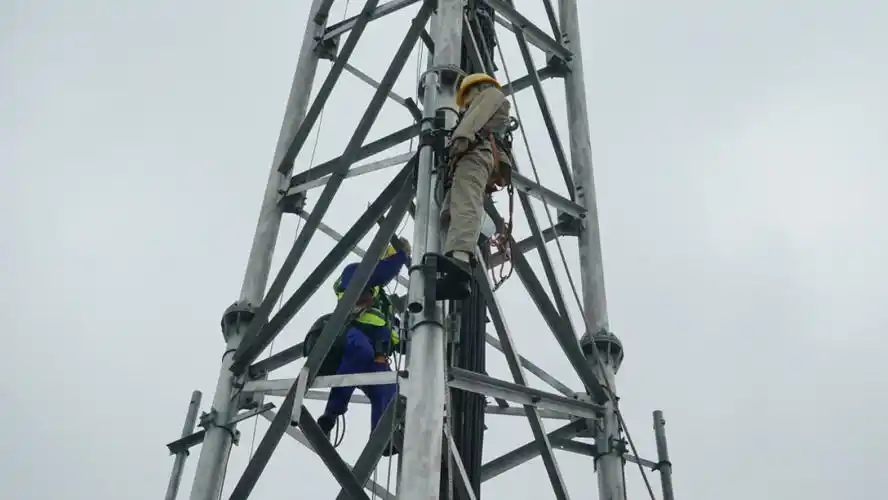
Crucially, the manufacturing specification extends beyond the bolt itself to the installation process, dictating the method for achieving the required Pre-Tension or Clamping Force in the connection. While the final tightening occurs during field erection, the manufacturing standard often requires the supplier to provide certified bolts, nuts, and washers that have been tested for their coefficient of friction and torque-tension relationship. The standard will often specify one of three tightening methods: Turn-of-Nut Method (requiring a specific fractional rotation of the nut past the snug-tight condition), the use of Direct Tension Indicators (DTI), or the more precise Calibrated Wrench Method (using a torque wrench calibrated to achieve the required pre-tension). Failure to achieve the specified tension compromises the integrity of the joint, allowing for slippage between members, which leads to increased stress reversals, fatigue, and eventual failure of the bolt or the surrounding steel. Therefore, the manufacturing specification must not only certify the quality of the fasteners but also provide the clear, validated installation procedure and the necessary tools and gauges to ensure the joint’s performance meets the design requirements. The standard recognizes that in the complex environment of a field assembly, simplified, repeatable, and verifiable tightening procedures are non-negotiable for structural reliability.
Documentation and Traceability: The Paper Trail of Conformity
In high-stakes infrastructure manufacturing, the component is only as good as the documentation that accompanies it. A key technical standard that underpins the entire supply chain is the Documentation and Traceability Standard. This standard dictates that the manufacturer must maintain a comprehensive paper or digital record—a “birth certificate”—for every single member of the tower structure, linking it back to the raw material’s origin, the machine that fabricated it, the zinc bath that coated it, and the final inspector who signed off on its dimensions. This requirement is paramount for Risk Management and Future Maintenance.
The documentation package, mandated by the specification, typically includes:
-
Mill Certificates: As discussed, guaranteeing the chemical composition and mechanical properties of the raw steel plate or angle.
-
Shop Drawings and Cutting Lists: Verifying the component’s geometry and the CNC code used for cutting and punching.
-
Galvanizing Certificates: Detailing the galvanizing bath temperature, dip time, and the results of coating thickness tests (e.g., magnetic gauge or stripping tests) to prove adherence to ISO 1461/ASTM A123.
-
QC/Inspection Reports: Signed off by independent or client-approved inspectors, covering dimensional checks, trial assembly reports, and any NDT results.
-
Fastener Certification: Certificates guaranteeing the strength class and coating of all bolts, nuts, and washers.
The technical condition demands that this documentation must be archived for a period exceeding the tower’s intended service life—often 75 years—allowing future engineers to trace the cause of any structural failure back to a specific batch of steel or a non-conforming manufacturing process. This stringent traceability standard transforms the manufacturing process from a simple production line into a fully auditable engineering discipline, where accountability is built into the very fabric of the infrastructure. The complexity of the transmission grid, with towers spanning thousands of kilometers, means that proactive maintenance and failure analysis rely entirely on the accuracy and completeness of these manufacturing records. Without this documentation, any subsequent issue becomes an expensive, time-consuming investigation; with it, the root cause can often be isolated and mitigated rapidly. This standard, therefore, is the administrative glue that holds the physical standards together, ensuring that engineering decisions made decades ago remain transparent and verifiable today.
Environmental and Sustainability Standards in Manufacturing
While the immediate focus of technical specifications is structural and material integrity, modern standards increasingly incorporate clauses related to Environmental Stewardship and Sustainability. A major transmission line project impacts vast territories, and the standards governing the manufacturing phase are evolving to mitigate the ecological footprint of the production facility.
These emerging technical conditions often require the manufacturer to adhere to:
-
Energy Consumption Limits: Standards may specify maximum energy use per ton of fabricated steel, incentivizing the use of energy-efficient CNC machinery and optimized heating systems for the galvanizing bath.
-
Waste Management and Recycling: The standard demands strict protocols for the disposal of hazardous by-products from the galvanizing process, notably the spent pickling acids and the zinc ash (dross). Manufacturers are required to employ closed-loop recycling systems to recover zinc from dross and neutralize or recycle the acids, minimizing industrial discharge in accordance with local environmental protection agency (EPA) standards.
-
Water Quality Standards: Specifications may impose limits on the effluent discharged from the facility’s washing and rinsing tanks, ensuring compliance with local water quality regulations, often demanding on-site treatment facilities before discharge.
-
Emissions Control: Control of air pollutants, particularly the fugitive emissions from the galvanizing fluxing process (which can release chlorides), is often regulated, requiring the installation of scrubbing systems to capture and neutralize these gases.
The inclusion of these standards reflects a necessary paradigm shift. The excellence of a transmission tower is no longer judged solely by its ability to carry a load, but also by the responsibility and sustainability of its creation. The manufacturer’s adherence to environmental specifications is often audited under third-party certification schemes, demonstrating a commitment that extends beyond the structural reliability of the product to the ecological health of the wider community. This complex integration of engineering precision with environmental accountability makes the modern manufacturing standard a holistic document that governs the entirety of the production value chain, from raw material procurement to final disposition of manufacturing waste.
The Future of Manufacturing Standards: Digital Integration and Advanced Materials
The evolution of transmission tower manufacturing standards is currently focused on leveraging Digital Technologies and Advanced Material Science. The future technical specifications will increasingly demand a deeper integration of the digital design model (BIM or 3D CAD) with the fabrication machinery, moving towards a truly Model-Based Definition (MBD) standard. This means the shop drawings will eventually be supplanted by the digital model itself, which contains all the geometric product information (including tolerances and material properties) necessary for production, inspection, and assembly. This shift promises to virtually eliminate human transcription errors and enhance the precision that is already so critical.
Furthermore, standards are being developed to incorporate Ultra-High-Strength Steels (UHSS) and composite materials into tower designs. While traditional galvanized steel will remain the dominant material, the technical conditions are being written to address the unique manufacturing challenges of these new materials. For UHSS, for example, the standards must include stricter controls on cutting and hole-punching to prevent micro-cracking and to compensate for the lower ductility of these stronger alloys. For composite materials (used in cross-arms or guyed mast legs), the manufacturing standard shifts entirely, focusing on the quality control of the pultrusion or filament winding process, the control of resin chemistry and curing temperature, and non-destructive testing for voids and delamination (such as phased array ultrasonic testing).
The next generation of manufacturing standards for transmission towers will be fundamentally digital, demanding compliance through data exchange and real-time monitoring of the fabrication process. They will move beyond prescriptive rules to performance-based requirements, emphasizing continuous monitoring and a proactive feedback loop from the field back to the design and production phase. The unwavering goal, however, remains constant: to ensure that the physical structure, regardless of its material or manufacturing method, can reliably and safely fulfill its role as the critical carrier of the world’s power infrastructure for its designed lifecycle and beyond. The technical standard is, and will remain, the ultimate expression of the engineering profession’s duty of care to society.


